
What Determines the Roof Stability of a Yankee Barn Homes Lincoln Structure?
Yankee Barn Homes Lincoln structures are renowned for their post-and-beam aesthetics and robust timber frames, but the long-term stability of these buildings hinges on precise engineering decisions within the roof system. Among the most critical yet often misunderstood elements are the rafter ties and collar ties. These horizontal or near-horizontal members work in tandem to resist outward thrust forces generated by roof loads—snow, wind, and the weight of the framing itself. For owners and builders seeking a durable, code-compliant structure, understanding where and how to place these ties is non-negotiable. This article examines the correct positioning, material specifications, and practical installation guidelines for rafter and collar ties in a Yankee Barn Homes Lincoln roof, drawing on structural engineering principles and real-world feedback from experienced framers.
What Is the Difference Between a Rafter Tie and a Collar Tie in a Yankee Barn Homes Lincoln Roof?
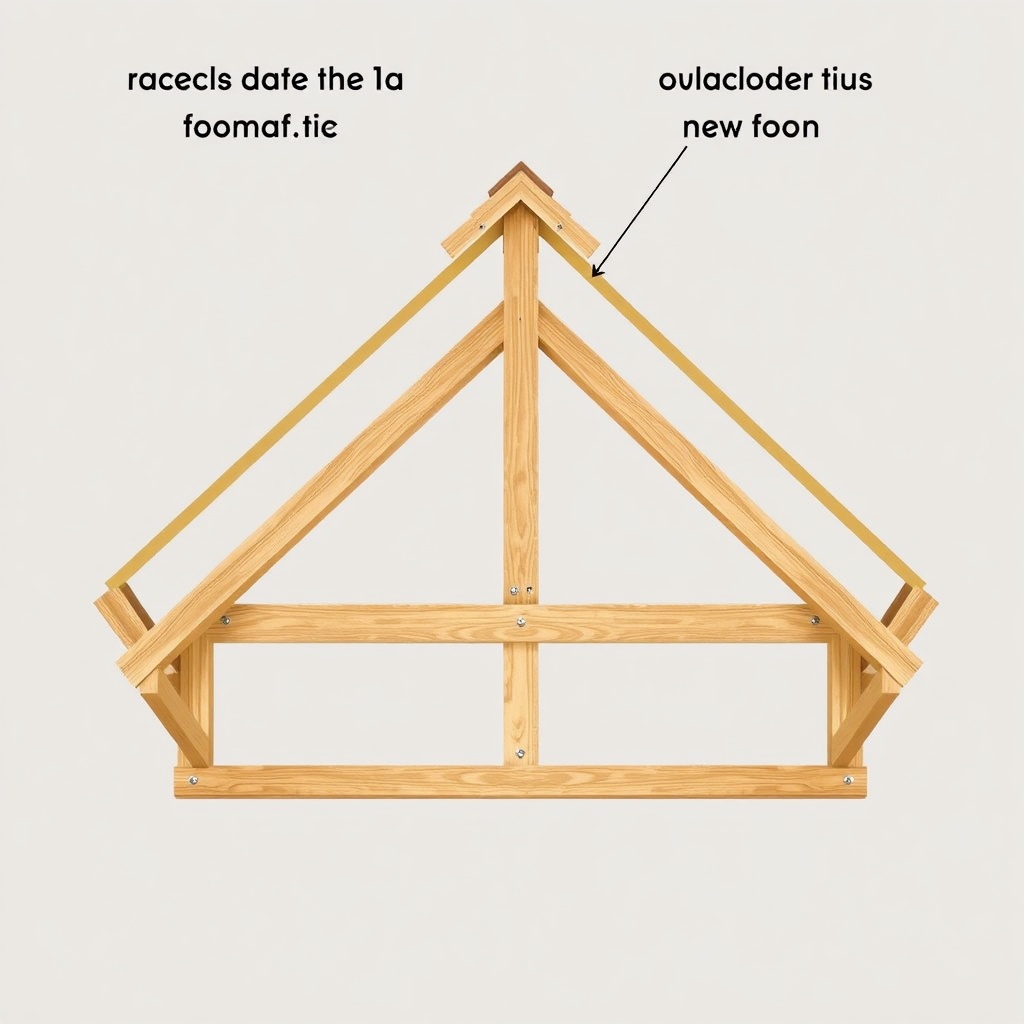
Though they may look similar, rafter ties and collar ties serve distinct structural roles. A rafter tie runs horizontally near the bottom third of the roof slope, typically at the same level as the ceiling joists or just above them. Its primary function is to prevent the rafters from spreading outward at the birdsmouth connection, effectively tying opposite rafters together to resist the outward thrust. In a Yankee Barn Homes Lincoln frame, these ties are often integrated into the floor or ceiling structure, acting as both roof and floor diaphragm connectors.
A collar tie, by contrast, is placed higher up the roof slope—usually in the upper third of the rafter span. Its job is to prevent the rafters from separating at the ridge under unbalanced loads like heavy snow drifting or wind uplift. While collar ties do not resist the primary outward thrust, they provide critical lateral stability, especially in roofs with steep pitches (above 6:12). For Yankee Barn Homes Lincoln builds, collar ties are commonly specified for roof pitches exceeding 8:12, where the risk of ridge separation rises.
In summary: rafter ties stop the walls from pushing out; collar ties stop the ridge from lifting. Both must be sized and spaced according to standing seam metal roof systems loads and local snow loads, which in the Lincoln area typically range from 30 to 50 pounds per square foot (psf).
How Should Rafter Ties Be Placed for Maximum Structural Performance?
Proper placement of rafter ties in a Yankee Barn Homes Lincoln roof demands adherence to the 1/3 rule: the tie must be located within the lower third of the rafter span, measured from the bearing wall to the ridge. This ensures that the tie resists the maximum outward thrust without causing bending stress in the rafter itself. For example, on a 12-foot rafter span, the tie should be placed at least 4 feet above the wall plate (or within the bottom 4 feet of the slope).
Material specifications depend on the span. For typical Yankee Barn Homes Lincoln homes, rafter ties are cut from #1 or #2 Southern Pine or Douglas Fir, with minimum dimensions of 2×6 for spans under 12 feet, and 2×8 for spans up to 16 feet. Connections must use galvanized 16d nails or structural screws (e.g., Simpson Strong-Tie 1/2-inch screws) at each end, with a minimum of four fasteners per connection. For tie ends embedded into timber columns, a mortise-and-tenon joint with a 1.5-inch-deep mortise is common, as detailed in Yankee Barn Homes Lincoln: Tools and Cutting Techniques for Beam Notching and Mortising.
Spacing is equally critical. For rafter ties, the maximum spacing is 24 inches on center, though many Yankee Barn Homes Lincoln plans use 19.2 inches to accommodate 8-foot sheathing patterns. In areas with high snow loads (over 50 psf), ties should be installed at every rafter pair, not staggered, to ensure continuous load path.
What Are the Code Requirements for Collar Ties in Yankee Barn Homes Lincoln Roofs?
International Residential Code (IRC) Section R802.3.1 specifies that collar ties must be installed at intervals not exceeding 4 feet on center, with each tie connecting at least one rafter pair. For Yankee Barn Homes Lincoln homes, where steep roof pitches (10:12 to 12:12) are common to accommodate the barn-style aesthetic, collar ties become mandatory regardless of snow load. The code requires the tie to be installed in the upper third of the rafter span—no higher than 2 feet below the ridge board for a typical rafter length of 6 feet.
Material wise, the minimum collar tie size is 1×4 (nominal), but Yankee Barn Homes Lincoln often upsizes to 2×4 for durability and to match the timbers visually. Fastening requires two 10d nails (0.148-inch diameter) at each end into the rafter, or a metal connector plate. For structural integrity, the tie should be continuous—never spliced—and installed with the wide face perpendicular to the rafter to prevent rotation under load.
A common mistake is using collar ties as rafter ties. If placed too low, they can induce bending in the rafter below the ridge, leading to mid-span deflection. Always verify your design against the advanced roof and shear wall integration guidelines for extreme weather resistance, especially if your site is in a high-wind zone (exposure C or D).
| Error Type | Consequence | Severity (1=Minor, 5=Critical) | Cost to Fix (Lincoln, NE, USD) |
|---|---|---|---|
| Rafter tie placed above lower third | Outward wall movement, roof sag | 4 | $1,200 – $3,500 (including re-framing and siding repairs) |
| Missing collar ties on pitch > 8:12 | Ridge separation under snow load | 5 | $2,000 – $5,000 (ridge beam replacement, roof re-shingling) |
| Insufficient fasteners at tie connections | Connection slip, progressive failure | 3 | $300 – $900 (additional nailing or screw retrofit) |
| Collar tie installed in middle third | Rafter bending stress, potential cracking | 3 | $600 – $1,800 (repositioning ties and new fasteners) |
| Wrong species (e.g., SPF instead of DF) | Inadequate strength under design loads | 2 | $0 if caught early, otherwise $1,500+ for replacement |
What Are the Load Calculations for Rafter Ties in a Yankee Barn Homes Lincoln?
Determining the load on each rafter tie requires basic structural analysis. The outward thrust force (H) at the bearing wall can be calculated using: H = (w × L²) / (8 × d), where w is the uniform load per rafter (plf), L is the rafter span (feet), and d is the vertical distance from the ridge to the rafter tie (feet). For a Yankee Barn Homes Lincoln roof with a 40-psf snow load, 24-inch rafter spacing, and a 12-foot span, the design load is:
- w = 40 psf × 2 ft spacing = 80 plf (snow) + 10 plf (dead load) = 90 plf
- Assume d = 4 feet (tie placed 4 feet above wall)
- H = (90 × 12²) / (8 × 4) = (90 × 144) / 32 = 12,960 / 32 = 405 pounds of thrust per rafter pair
Each rafter tie must resist 405 pounds in tension. A 2×6 DF-L grade #2 has a tensile capacity of about 1,100 pounds, so this is well within limits. However, for spans over 14 feet or snow loads over 50 psf, upgrade to 2×8 ties or reduce spacing to 16 inches. For Yankee Barn Homes Lincoln designs that incorporate open cathedral ceilings without ceiling joists, rafter ties must be visible and precisely notched to maintain the timber look—this is where mortising techniques become critical.
How Does the Foundation Choice Affect Roof Tie Placement?
The roof system’s load path ultimately travels to the foundation. A slab-on-grade foundation for a Yankee Barn Homes Lincoln provides a rigid base that reduces wall movement, allowing slightly more flexibility in rafter tie placement (within the 1/3 rule). Conversely, a crawlspace or basement foundation can introduce settlement risks if the soil conditions are unstable, potentially causing wall rotation that transfers stress to the roof connections. For slabs, the tie-to-wall connection must be engineered for a minimum of 500 pounds of uplift due to wind, as per ASCE 7-16. This is why many builders consult comparisons of slab-on-grade vs. crawlspace foundations before finalizing the roof plan.
Further, a foundation that is not level (e.g., due to frost heave or poor compaction) can cause the roof walls to lean, increasing the force on rafter ties. In such cases, retrofit ties may be needed, often in the form of steel rods or tension cables. For new builds, the best approach is to compare foundation options early to ensure that the roof design matches the soil capacity.
What Owners Say About Rafter and Collar Tie Installation
Feedback from owners of Yankee Barn Homes Lincoln structures highlights the value of proper tie installation. One owner in Lincoln, Nebraska, who built a 1,800-square-foot barn home with a 10:12 pitch, noted: “Our contractor initially only installed rafter ties at every third pair. After the first snow season, we noticed ceiling cracks. We had to add ties at every rafter pair—a $2,200 fix that could have been avoided.” Another owner, building on a slab-on-grade foundation, praised the visible rafter ties: “They’re part of the aesthetic. We used 4×6 white oak ties that match the ridge beam. The house feels rock solid during windstorms.”
Several owners recommend hiring a structural engineer for any roof with a pitch above 8:12 or a snow load over 40 psf. “We saved money by cutting our own collar ties from dimensional lumber, but we had the engineer stamp the layout,” said one builder. “It’s worth every dollar for peace of mind, especially with a standing seam metal roof that sheds snow quickly.” For those integrating roof systems with advanced shear walls, the tie placement must be coordinated with plywood nail patterns—a step often overlooked but critical for standing seam metal roof performance.
Frequently Asked Questions
1. Can I omit rafter ties if I have a ridge beam?
No. A ridge beam supports only the vertical load at the ridge, not the outward thrust at the walls. Rafter ties are still needed to resist horizontal forces unless the roof is designed as a rigid frame with moment connections, which is rare in residential barn frames.
2. What is the maximum spacing for collar ties in a Yankee Barn Homes Lincoln roof?
The IRC limits spacing to 4 feet on center, but for roofs with clay tiles or heavy snow loads, spacing should be reduced to 24 inches on center. Always consult local building codes for Lincoln, NE, which may adopt stricter standards.
3. Do I need collar ties if my roof pitch is below 4:12?
Generally, no. Low-pitch roofs generate less ridge separation force. However, if the roof is in a high-wind zone (over 110 mph gust), collar ties may still be recommended to prevent uplift.
4. Can I use metal straps instead of wood collar ties?
Yes, approved metal connectors (e.g., Simpson Strong-Tie CTS22 or A34) can replace wood ties, provided they are rated for tension and installed with appropriate fasteners. This is common in cathedral ceilings where wood ties might interfere with the aesthetic.
5. How do I inspect existing rafter ties for damage?
Look for visible cracks at the connections, bent nails, or gaps between the tie and rafter. Use a level to check for wall bowing. In severe cases, hire a structural engineer to perform a load test, especially if the roof has sagged.
6. Should I install collar ties above or below the ridge board?
Collar ties should be installed below the ridge board, typically 6 to 12 inches, and must be securely fastened to both rafters. Placing them too high can cause the ridge board to split under tension.